Homeowner Tips From A Certified Home Inspection Pro

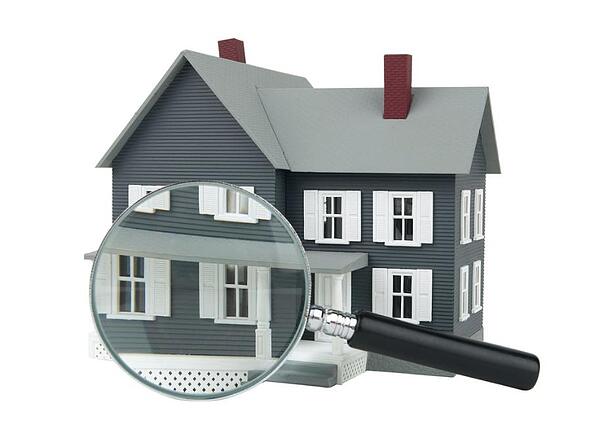
Things to Check Before a Home Inspection

Knowing what issues might come up during a home inspection can help alleviate that anxiety. While under no circumstances should you make an effort to cover up an existing problem, the following tips can serve as a guide to help prepare you and your home for a home inspection.

A home inspection of the roof

If you’re curious about the condition of your home’s roof, do yourself a favor: Do not ask your insurance company to come and look at the roof. Even if there is no damage, requesting an insurance company to inspect your roof may be reported as a claim.

Inspecting the HVAC system

The heating and air conditioning systems are at the top of the list for almost every homebuyer. If your home has older heating or A/C units, it can be well worth the money to have a reputable, licensed HVAC company or technician perform a tuneup or regular HVAC maintenance before your home is inspected.

Checking the electrical system

A working electrical system is invaluable to any home, but electricity is dangerous and it should be treated with the respect it deserves. For that reason, any work or evaluation to your home’s electrical system should be conducted by a licensed electrician.

A home inspection of the plumbing system

More and more homeowners are hiring plumbers and drain clearing services to inspect the sewer lines commonly found in older homes to alert them to possible future problems. While that’s definitely an option, it can be somewhat costly.

Things Every Home Inspection Client Should Know

Almost Anything Can Be Fixed

There are a few things that terrify a client when they hear them: mold, asbestos, safety. Yes they can be scary but no scarier than a furnace that needs replacing or windows that need repairs and painting.

Not Everything Will Get Fixed

Right after I tell my clients that my wife still loves me, even with my issues, I qualify that by saying, “Some things will never change and thank goodness she understands.”

Can not Predict the Future

I really wish could tell you how long the roof will last or when the furnace will need to be replaced. It’s just not possible. can give you an idea how long they normally last and what kind of condition they are in now. But no one can predict the future.

Will Not Find Everything Wrong in The Home

are here to find the big stuff. Things of consequence like water, safety, structure. will not find or report on everything wrong in the home. That is just not what are here for

Get Your Heart and Head in Check

It can be incredibly tough to step back from your love of the home to see it as an investment. Once you see our list of repairs and observations, it can be a bit overwhelming. Take a deep breath.

home inspection mistakes buyers and sellers make

A home inspection is an assessment of a home’s condition. Home inspectors not only identify problems with houses, they can give buyers information that will help them with the upkeep.

Not researching the inspector

Too many buyers and sellers hire whoever is recommended to them without doing any research. The inspection is only as good as the inspector doing it

A few questions to ask:

• How long have you been inspecting homes?

• How many inspections have you done?

• What are your qualifications, certifications and training?

• What was your job before you were a home inspector? (Ideally, your pro was in contracting or building.)

You want a certified professional who stays current. “There’s a lot of stuff you have to know, and you want someone who’s keeping up with ongoing education,” says

The inspection might take an entire morning or afternoon, so set aside enough time. Some inspectors will sit with you afterward to explain things. “Any home inspector who doesn’t let you follow him around? That’s weird. Ask me any question you want,”

How Sellers Can Prepare For A Home Inspection

One of the most common clauses in a residential real estate contract is the home inspection contingency. If included, a home buyer has a specific amount of time (typically 7-10 days after the contract is ratified) to have a licensed professional conduct a home inspection and to either negotiate for repairs or to back out of the contract if they do not like the results of inspection.

If a seller knows what to look for, they can resolve many minor items before the home inspection occurs. While some items identified during the inspection might seem like minor issues individually, collectively, they could add up to major headaches, involving both time and money. So, read on to learn how to sellers can best prepare for a home  inspection.

The purpose of a home inspection is to document the overall condition of the property at the time of inspection and to ensure that its major systems and components are working properly. Therefore, the primary thing that an inspector will need is access, including the garage, attic opening, crawl spaces, closets, basement, water heater, electrical panel and other mechanical systems. If the inspector cannot access those areas, they cannot be included in the report, which may raise questions for your buyer.

Prepping the Interior

Test smoke and carbon monoxide detectors and replace any dead batteries

Check all electrical outlets to make sure they are working

Replace any burned out light bulbs and make sure there are light bulbs in all sockets. Any flickering light fixtures can be possible signs of a problem for an electrician to investigate

Fix any leaky faucets and any clogs in the sink drains

Check to make sure that all toilets flush properly

Check to ensure that all appliances are working properly. Clean out oven and stovetop so they can be tested without setting off the smoke alarm

Make sure that all grout and caulking in kitchen and bathrooms is in good repair

Fix doors that don’t close or latch properly

Check to make sure that windows open and close properly

Have remote controls available for ceiling fans, lights etc.

Make sure all utilities are turned on. This includes water, electricity, furnace, A/C and the water heater. You may want to also replace your air filter as they impact the efficiency of your overall HVAC system

If you have a gas fireplace, make sure the pilot light is on

Prepping the Exterior

Clean out the gutters and repair any damages

Check siding and trim and repair any damage as needed

Repair any missing caulking around doors, windows and over nail heads

Repair any damaged or missing roofing

Make sure the garage door is operating properly

Remove any locks on outside gates which prevent full access to the exterior

If you have a septic tank or well in your yard, leave a sketch with its location so the inspector can find it

A Few Other Tips

If something isn’t working properly, it’s best to not try and hide it. Buyers get suspicious when sellers deliberately try to conceal defects. They may see you as dishonest and wonder what else you are hiding.

Home Inspection Checklist

A consumer home inspection checklist does not replace the professional home inspection. You do the consumer home inspection before making an offer to purchase a home. Once you conduct your own consumer home inspection and make a decision to buy a particular home, you will sign a contract and have the home you’ve selected professionally inspected. The professional home inspector gives you an objective and comprehensive report before closing.

Before You Conduct a Home Inspection

Schedule your home inspection during daylight hours. You may want to bring along the following tools.

Consumer Home Inspection Form (follows this introduction)

A powerful flashlight to use in basements and crawl spaces

A stepladder to look in the attic to check insulation, the underside of the roof and indirect lighting fixtures

A tape recorder to record any information too lengthy to note on the inspection form

A circuit tester to check the circuits

Helpful Hints

Plan to go through the home completely twice so you can do an overall analysis. Remember to consider the following when you conduct your home inspection so you can effectively evaluate the home:

The existing condition of all systems and equipment

Any unusual features that may increase or decrease the appeal of the home

Any problems or features you want your professional home inspector to check out

The quality and condition of the structure

Routine house cleaning and maintenance items: paint, furnace filters, gutters, caulking in bathrooms, landscaping, floors, appliances, walls, etc

What to Expect

This checklist will give you the information you need to identify a home’s distinguishing features that make it attractive for purchase

Estimate the costs and identify solutions for any problems uncovered during the consumer home inspection

Provide a basis for comparing homes you are considering buying

INTERVIEW THE OCCUPANTS

It’s possible to collect a tremendous amount of useful information before you conduct the consumer home inspection by sitting down with the sellers or occupants. Ask open-ended, leading questions. You may begin by asking the occupants:

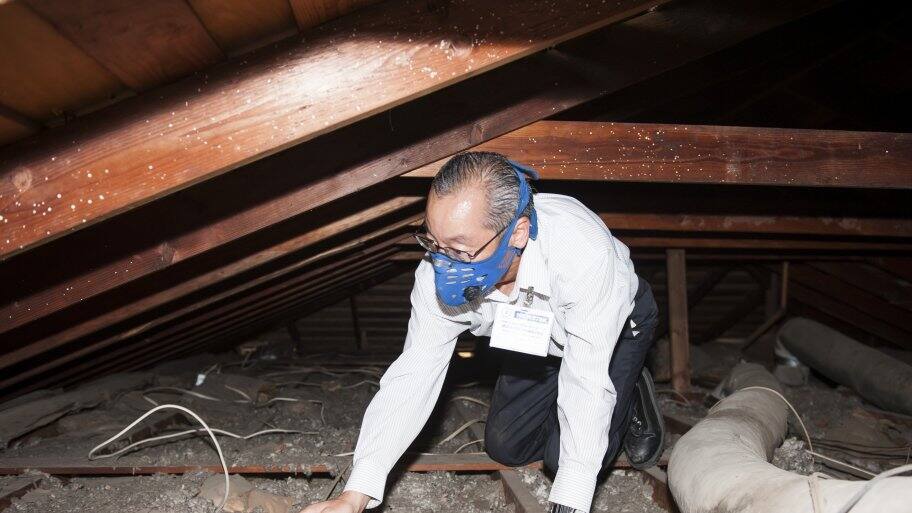
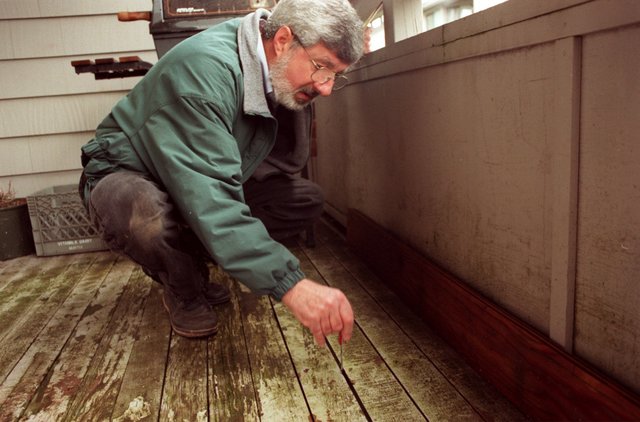
Are you aware of any termite damage or activity in your home? Virtually all homes sold today require a termite inspection and certificate so a complete history of any damage, treatment or repair is important to know from the start.

Does your home have any existing or repaired structural problems, such as cracks in the basement floor, rotted floor joists or settlement cracks in the walls?

Do you ever have moisture in your basement? A typical concern when buying a home is a wet basement or crawl space. It’s important to learn about a wet basement early so that it can be repaired or you can negotiate the price of repair before you buy the home.

Have you seen any signs of a leaking roof? If the roof has leaked in the past, it’s important to determine whether repairs were made or a new roof was installed. If the home has an asphalt/fiberglass shingle roof, which usually lasts 15 to 18 years and the home is 17 years old, ask if the roof has been replaced recently. A professional home inspector can determine this for you.

Have you experienced any problems with the heating or air conditioning systems? Find out the ages of the heating and cooling equipment and any problems the occupants may have had with the systems.

Have you tested your home for radon recently? The risks from radon gas vary greatly in different parts of the country. Contact the local environmental protection agency to obtain information about the presence of radon in the area.

Is the electrical service satisfactory? Find out the capacity of the electrical service and whether the occupants have had problems, such as fuses blowing frequently, circuits overloading, outlets not working or lights flickering when appliances are turned on.

What is the condition of the plumbing system? Find out about the water pressure, whether the plumbing leaks, whether there’s enough hot water, the age of the water heater and whether the system has been updated in any way.

Have you remodeled or made improvements to your home? If improvements have been made to the home, inquire about the competence of the

individual or company who provided the service. Check the credentials of the person who made the improvements, to make sure he or she is a licensed builder, owner or technician.

Was your home built before 1978? Before 1960? Some homes built before 1978 and many homes built before 1960 contain lead-based paint. If the paint is chipping, peeling, cracking, flaking etc., and contains lead, it may be dangerous especially for children younger than 7. You may wish to inquire specifically if the home contains lead paint or if it has ever been tested for lead paint.

High Risk Merchant Accountant Pros And Cons

What Are The Methods Of Branch Accounting?

Branch Accounting System

A business is often separated into a number of different branches each of which is treated as its own profit center. Branch accounting allows the business to prepare branch trading and profit and loss accounts in order that it can assess the profitability of each of these branches.

The advantages of branch accounting are that the business is able to identify the financial performance of each of its branches. By making comparisons it can identify inefficient branches and make informed managerial decisions about their future. In addition managers and staff can be given responsibility and motivated and rewarded on the basis of branch performance.

It should be noted that branches differ from departments in that they are operated from different locations; for example a retail business might have branches in different cities. In contrast departments are usually operated from the same location.

Recording Branch Accounting Transactions

The simplest method of branch accounting is for the head office to operate a single branch account for each branch. The method is sometimes referred to as the debtors system or direct method system. The method is most often used when there are a small number of branch accounting entries in the books of the head office.

Objectives Of Branch Accounting

To ascertain profit or loss at branch: Every business house wants to measure the performance of its branches separately. Hence, separate records for each branch are necessary. Efficiency or otherwise of a branch can also be measured with the help of its accounting records.

To ascertain true financial position of business: Branch Accounting helps the business to ascertain its true financial position. Accounting records of the assets and liabilities will helps in preparing in the balance sheet which is a mirror of the financial position.

Compliance with statutory requirement: Branch accounts are necessary to meet large requirements with the company law, Income tax laws and other such acts.

To increase efficiency of the branch: Branch accounts are the indicators of the efficiency of the branch. They will indicate the loopholes or drawbacks which can be rectified in time. In this way, branch accounts will be helpful in increasing the efficiency of the branch.

To exercise control over branch: Head Office exercises control only through information supplied by branches to head office. The main source of information is the accounts maintained from branch transactions.

How Branch Accounting Works

In branch accounting, each branch (defined as a geographically separate operating unit) is treated as an individual profit or cost center. Its branch has its own account. In that account, it records such items as inventory, accounts receivable, wages, equipment, expenses such as rent and insurance, and petty cash.

Like any double-entry bookkeeping system, the ledger keeps a tally of assets and liabilities, debits and credits, and ultimately, profits and losses for a set period.

Technically speaking, in bookkeeping terms, the branch account is a temporary or nominal ledger account. It lasts for a designated accounting period. At the period’s end, the branch tallies up its figures and arrives at ending balances, which are then transferred to the appropriate head office or head department accounts. The branch account is left with a zero balance until the accounting process begins all over again with the next accounting period or cycle.

Branch Accounting Methods

There are several different methods for keeping branch accounts, depending on the nature and complexity of the business and the operational autonomy of the branch. The most common include:

  • Debtor system
  • Income statement system
  • Stock and debtor system
  • Final accounts system

Types of Branches

#1 – Dependent Branch

Dependent branches are those branches that do not maintain separate books of accounts; ultimately, there profit & loss statement and Balance sheets are collectively managed by the Head office only. Only a few pieces of information have been maintained by branches separately, like Cash Accounting, Debtors Accounting, and Inventory.

#2 – Independent Branch

Independent branches are those branches that maintain separate books of accounts ultimately, and their profit & loss statement and Balance sheets are maintained separately from their Head office. In this case, the Head office and Branches are treated as separate entities.

Advantages and Disadvantages of Branch Accounting

The primary advantages (and often, the objectives) of branch accounting are better accountability and control since the profitability and efficiency of different locations can be closely tracked.

On the downside, branch accounting may involve added expenses for an organization in terms of manpower, working hours, and infrastructure. A separate account coding structure must be maintained for each operating unit. It may be necessary to appoint branch accountants to ensure accurate financial reporting and compliance with head office procedures and processes.

Eco Friendly Deep Cleaning Products Recommended By The Commercial Cleaning Pros

TIPS TO MAKE THE MOST OF YOUR ANNUAL DEEP CLEAN

Not only does an annual deep cleaning scour your place of hidden dust mites and mold spores, it also helps protect you against viruses and bacteria. With the potential for COVID-19 floating in the air and clinging to surfaces, there’s plenty of motivation to set about spring cleaning coronavirus out of your home.

Traditional spring cleaning includes chores like dusting, window cleaning, giving your carpets a proper wash, and a fair share of polishing and waxing. With this home cleaning checklist, we’ll give you all the best spring cleaning tips, plus a boost for combatting coronavirus.

BE SURE TO BOTH CLEAN AND DISINFECT FOR A CORONAVIRUS SPRING CLEANING

Did you know there’s a difference between cleaning and disinfecting?

Cleaning is the removal of grime and germs from surfaces. Cleaning doesn’t kill viruses, but it lowers their numbers. You can clean a surface using a simple combination of soap and water, which is very effective against COVID-19.

Disinfecting involves using a chemical to kill germs on surfaces after you clean it, which lowers the risk of spreading infection. You can use a simple bleach combination to disinfect, which is ⅓ cup of bleach per gallon of water, or 4 teaspoons of bleach per quart of water. Let the bleach sit on the surface for at least one minute before you dry it completely.

regularly cleaning and disinfecting areas of your home which are touched frequently — three times per day if someone in your house is sick. This includes:

Kitchen and bathroom counters

Light switches

Doorknobs

Faucets

Toilets

Electronics

USE THE RIGHT PRODUCTS FOR CORONAVIRUS CLEANING

Bummed out by the empty shelves in the cleaning products aisle of the grocery store? Don’t despair. There are tons of products out there that can get rid of the nasty coronavirus. Luckily, the EPA released a list of the chemicals you can use, which include common household items like hydrogen peroxide, isopropyl alcohol that’s 70% alcohol (rubbing alcohol), and even certain Lysol toilet bowl cleaners.

DUST YOUR HOME THOROUGHLY

Spring cleaning is a great time to both clean and declutter your home. If you’ve got major clutter to deal with, getting a portable container delivered to your driveway may be just what you need to get the job done, especially if you need to make room as you work. Having temporary at-home storage can also help if you need to separate items to go to relatives, donations, or a garage sale

How to Clean a House

Cleaning your house seems like a fairly self-explanatory task, but when you sit down to think about it, you might realize that you have a lot of questions. And how do you clean a toilet, anyway? We’ll work it down into a streamlined process that seems simple enough to tackle and instantly gratifying. Once you get started, you won’t want to stop until the whole house is spick and span.

Decide how clean you want your house to be and how much time you have. This will help you decide how to set up your cleaning schedule. Be honest with yourself about what you can do, how much time you have, and how motivated you’re feeling.

Work from the top down, if at all possible. You don’t want to vacuum and then get crumbs all over the floor, or dust the bottom of something and knock more dust down when you work your way up onto the previously uncleaned areas. If you don’t have much time, start with the clutter first and work your way to more serious things from there.

For the “average” busy person it works better to do a little bit every day so that the work doesn’t pile up, and also have major-cleaning day a few times a month. What style you prefer is up to you (unless you have roommates, of course).

Keep a check on areas of the kitchen subject to grease and grime buildup that need regular but less frequent cleaning, such as the tops of cabinets and the kitchen exhaust fan. It can be easy to overlook higher features in the kitchen but grease and grime gather in these areas and attract dust and insects.

Make a checklist and a plan of attack. Know which rooms you plan to start and finish your cleaning in (generally back to front door works best). This will help expedite the process and ensure you are not duplicating your efforts, especially if more than one person is involved in the cleaning.

You can follow the steps in the cleaning part in order. This way, you’ll have a checklist already written out for you.

Make a plan so that you can vacuum, sweep, and mop all rooms at the same time (and so that your hot water doesn’t get cold) so you won’t have to go from one task and then repeat the same thing again.

Attempt to delegate tasks. If you live with other people, cleaning the house should not be exclusively your responsibility! You may have to take on leadership by setting up a rotational cleaning schedule, but it’s far better than having to do this backbreaking work alone.

Clean the toilet. Ugh. Cleaning the toilet is never fun, so it’s best to get it over with as soon as possible. Put on a pair of rubber gloves (not the ones you use to clean the dishes!) to keep your hands safe from the grime and bacteria. Give the toilet a gentle wash-down with a sponge and hot water to loosen everything up. Let it soak in the hot water while you move onto the bowl.

After that, squirt toilet cleaner into the inside of the bowl and around the rim. Let it soak for a minute and then scrub it with a toilet brush. When you’re finished, give it a flush.

When you’re done with the bowl, return back to the outside surfaces. Spray them down with a disinfectant spray and wipe dry with a cloth or paper towel.

SECRETS THAT WILL HELP YOU KEEP YOUR HOUSE CLEAN AND ORGANIZED ONCE AND FOR ALL

When I clean I attack one room at a time and don’t lose focus.  It’s so easy for me to get sidetracked when I’m cleaning!  I’ve found that I get more accomplished if I focus on one room at at time and keep working until it’s done.  If I pick up something from the kitchen that belongs in the office and then when I get there I start tidying up my office, before long I’m all over the place starting everything and not really finishing anything.  By focusing on one room at a time I always get a least a few spaces completely clean.

While I’m doing my daily clean-up, I’m constantly getting rid of things.  I think this is the number one secret to keeping your home clean and organized!  Less stuff in your house means less stuff you have to manage.  While I’m cleaning if I come across clothes we aren’t wearing, kitchen supplies I don’t cook with, toys my kids have out grown, decor that is outdated.. I toss it in a good will bag in the garage and don’t look back!  Aside from a few sentimental items, I seriously have NO problem getting rid of things.  I always have a few black sacks in my garage that are ongoing “take to good will bags.”  Often friends will say to me “I need you to come and organize my house!”  I always tell them they’d actually hate that because I would make them toss 80% of what they own.

I have a place for most things we keep.  I work really hard to only keep what we use and love.  Then I make sure that everything we use and love has a happy home.  I also make sure my kids and husband know where things belong so that when it’s time to clean up we all know where everything needs to go.

I have some help.  I first hired house cleaners to help me clean in my previous house years ago when I was pregnant with my second child.  I don’t mind cleaning at all and had always done all of our housework, but I was having serious back problems in my 3rd trimester and just couldn’t bend over to scrub and deep clean.  My husband was working around the clock getting his career established and couldn’t help much, so we looked at our budget and found things we could cut so that we could afford some help with the deep cleaning.  It was a sacrifice at first, but so worth it!  Together the cleaners and I could clean in hours what it would take me four days to do alone.  Ever since then I’ve loved having some help with the deep cleaning and it’s something we make sure to prioritize when we figure out our budget.

I have a cleaning routine.  There are a few things I do daily and weekly so that our house never gets completely out of control.  I do most of my laundry on Mondays and Fridays.  Monday because I like to have it caught up by Tuesday (my main cleaning day) and then I do laundry again on Friday as part of my Week Ahead Prep.  Tuesday mornings I wake up at 6:00, get ready and pick up my bathroom.  Then I throw a set of sheets in my washer.  I wake my kids around 6:45 and get them ready for school and dropped off by 8:00.  Around 9:00 on most Tuesdays my cleaners come and we get to work!  They start deep cleaning in my bathroom (which is why I pick it up first thing that morning) and then for the next two hours they basically follow me through my house.  I hit each room putting things away where they go, loading and washing any dishes in the kitchen, straightening the pantry, going through papers that need to be tossed, etc.

Deep Cleaning Services

Deep cleaning –– it’s one of those things always lingering at the bottom of the to-do list but it never quite happens. There’s just always something that takes priority. Who has the time? Who even knows what to deep clean or in what order? Experienced deep cleaning Taskers, that’s who.

What’s included in a house deep cleaning?

The short answer: anything you want. Just communicate your to-do list with your Tasker, and prepare to be amazed. The long answer: think of all the places that build up with a little extra dirt and grime over time. That’s what will get cleaned during a deep cleaning service. Think scrubbing the freezer, cleaning the inside and tops of cabinets, cleaning behind the toilet and under the sink, and more. This is all in addition to what a typical house cleaning entails.

We are renovating our house and it’s a mess. Can TaskRabbit help?

Sure can! Whether it’s a renovation you’re recovering from, or just daily life, deep cleaning Taskers will roll up their sleeves and really use their muscles to get into all the nooks and crannies to make them shine like new. Tops of cabinets, inside of freezers, window sashes –– oh my! You name it, deep cleaning Taskers can clean it

Do I need to provide cleaning supplies for my deep clean?

Nope. If you have favorite cleaning go-to products, feel free to provide them to your Tasker, but you don’t have to. Just let the Tasker know to bring supplies, and get ready to watch your house sparkle from top to bottom. Taskers usually have their favorite deep cleaning products with extra muscle to cut through that last layer of buildup we all have in our homes, so no shame in relying on their experience.

Do I need to be home during the cleaning?

No, you don’t. But you’re welcome to stick around if that’s what works for you. No matter what’s on your to-do list, whether that’s scrubbing the laundry room floor and behind the toilets or sweeping out the garage, deep cleaning can take a long time so do whatever works best for your schedule.

Best Car Cleaning Tips and Tricks

Wash your car with the right suds

Even though liquid dish soap is a great degreaser, it’s not the thing to use on your vehicle’s finish. Yes, it removes dirt, grease and old wax. But it also sucks important oils right out of the paint’s finish. Use it repeatedly and you shorten the life of your paint job.

Pluck the finish

A car hurtling down the road at 100 km/h becomes a dartboard for any crud in the air. Your vehicle’s clear coat deflects some of it but can hold the sharper grit. Washing removes the surface dirt, but clay-barring is the only way to pluck out the embedded stuff.

Polish the finish

Many car owners confuse polishing with waxing. But they’re separate steps. Polishing removes small surface imperfections and scratches and buffs the finish to a shine. Waxing adds more gloss and protects the finish from the elements. Most DIY-ers skip polishing because they don’t want to invest the money for a polisher or the elbow grease for a hand polish. But polishing your vehicle’s finish is the key to getting the best gloss (pros would never skip it).

Get a mirror finish with synthetic wax

Some people swear by carnauba wax. It produces a deep, warm shine. But we prefer the wet-gloss look of the newer synthetic polymer waxes (also known as paint sealant) such as Meguiar’s Ultimate Liquid Wax. It’s pricier than other synthetics, but it doesn’t leave a white film on plastic or trim-which is a real advantage. Plus, it’s really easy to apply

Suck up the dust as you go

Most DIY-ers start cleaning their car interior by shampooing the carpet. That’s a mistake-you’ll just get it dirty again as you clean the upper surfaces. Instead, start at the top and work your way down. Vacuum the headliner, dash, console and door panels. Then clean all the glass, and dust the nooks and crannies. Sweep the dust out of the cracks with a detailing brush. Catch all that crud right away with your vacuum.

Chiropractor On Natural Relief Of Pain And Inflammation

Why do I feel worse after chiropractor?

If you are new to chiropractic care and are not quite sure what to expect, then the idea of “feeling worse” after a visit to the chiropractor may leave you skeptical. However, what many people describe as “feeling worse” is actually the mild discomfort that comes with encouraging your spine and muscles into more healthy positions. Reactions to chiropractic care vary from person to person and can also depend on how long they have been visiting a chiropractor and receiving adjustments.

Conversations with Your Chiropractor

Your chiropractor will explain what to anticipate before, during, and after the adjustment so you are completely comfortable and at ease with the entire process. It can be incredibly helpful to understand the perspective of your chiropractor and where they assess your body to be before the first adjustment and their treatment goals for the whole therapeutic process through the final adjustment.

It may get worse before it gets better

Visiting the chiropractor for a new pain often means instant relief during your adjustment. But it’s not unusual to notice soreness a few hours after your appointment, and it may be even worse than the pain that had you calling the chiropractor in the first place! So what’s going on?

If you’re new to chiropractic care, years of accumulated spinal misalignments will mean some amount of discomfort after your first few adjustments. That’s because there are changes happening in your body. And while they may be positive changes, they’re still uncomfortable. The key is giving your body some time to adjust and adapt to these changes. Think of it like this – the first time you lift weights or run a mile can be incredibly uncomfortable, to the point that may even feel physically ill. For a day or two or three afterward, your body will feel sore and weak. But sticking to your workout plan means your body will begin adapting. Within even just a few weeks, you won’t have the same negative reaction to your workouts.

The same is true with chiropractic care

When misalignments that have been present for years – or just a few days – are suddenly corrected, your body needs time to adjust to the change. Muscles, ligaments and joints must re-adapt to the vertebra’s improved new position, and that takes time.

Soreness

When you get an adjustment, your vertebrae are being moved slightly. Your muscles have to adapt to the movement of the bone, so they may end up lengthening or shortening slightly, which can lead to soreness. The soreness is related to the movement of the bones and not to the pressure utilized by the chiropractor. It can also be due to the release of the tension in your muscles, similar to when you work out and are sore as your muscles repair themselves. As your body gets used to being in proper alignment, the muscles will adjust accordingly and stop being sore.

The more frequently you get adjusted, the faster your body will get used to being adjusted and the longer it will “hold” the adjustment, which will reduce or completely eliminate the post-adjustment soreness. If you have long-lasting or extreme soreness or continue to be sore after many adjustments, talk to your chiropractor or orthopedic surgeon about exploring other possible causes for this.

Illness

Sometimes after visiting the chiropractor, you might start feeling sick. This doesn’t mean that your chiropractor got you sick or that your adjustment caused a sickness. When you get adjusted, your entire immune system is jumpstarted, meaning it’s working at optimal efficiency to clear out whatever is in your body that shouldn’t be. This can lead to some coughing, a runny nose, or some sneezing, or could even result in a full-blown cold at times. Remember that all these “symptoms” are your body showing signs of health, and they are your body’s way of getting rid of bad stuff inside of you. Without the adjustment, you most likely still would have gotten sick, but with the adjustment, the sickness severity and length is significantly lessened.

Digestive Changes

Just as with soreness and illness, digestive changes can be a surprising and frustrating reaction to a chiropractic adjustment. Because your digestive system is directly linked to the vertebrae in your lower back, getting adjusted can bring about some shocking fluctuations in your bowel movements. Some people with issues like constipation or IBS will see more regular bowel movements after adjustments, while those with normal bowel movements may see an increase in irregular digestion. If this is the case, talk to your chiropractor, primary care physician, physical therapist, or orthopedic surgeon about these changes if they are long-lasting or impact your day to day life.

Is it normal to feel WORSE after getting adjusted?

After I get adjusted I want to take a nap and eat a steak! Ha-ha! But in all seriousness an adjustment is a powerful healing force and after getting adjusted your body is going to jumpstart its immune functions and also inflammatory responses to start healing. What that means is that your immune system is going to start working hard to clear out any illnesses that have been hanging out in your body (like that pesky Humboldt crud you can’t shake!) which can lead to runny noses, coughing, or interesting GI results after an adjustment. The inflammatory system in your body is going to start repairing the damage caused when your muscles were all tight and angry before the adjustment which can lead to muscle soreness the day after similar to how you feel the day after a workout.

All of this is normal but can be lessened by drinking lots of water, eating some healthy food and getting a good night sleep after an adjustment. Also, a few hours of minor muscle soreness and needing to blow your nose a few times is a small price to pay for getting rid of headaches or debilitating low back pain. Any unpleasant side effects of chiropractic care should be relatively minor and go away within a day or two after treatment.

Toxic Release From ChiropracticTreatment

Some of the symptoms you may experience if your body does go through toxic release are fatigue, headache, night sweats, tight muscles and diarrhea. Feeling extremely tired after a chiropractic session is very common. This is due to your body adjusting to the new way your nervous system is reacting to the treatment. Before your alignment, its likely that your nervous system was being jammed up in areas by subluxations. However, through chiropractic manipulations, your nerves may be able to work at their optimal level, which can be very tiring to the body if it has been deprived of this for some time.

Your body is reacting to chemical signals from the brain to the spinal cord constantly throughout the day. When that flow of energy gets disrupted due to spinal subluxations, or dysfunctions of the spine, then that course of action is slowed down. By clearing out those blockages and regulating that flow of information to its optimal speed, then there is going to be an adjustment period for your body, causing it to feel very tired, and even sick, in the meantime.

A better way of imagining this process is to think of your nervous system as a garden hose. When there is a kink in the hose then the water gets jammed, unable to flow throughout the hose efficiently. This is the same for your nervous system. If there is a subluxation in your spine, it blocks that flow of energy causing pressure to build up. That pressure can cause a number of ailments, from headaches to chronic pain. That pressure needs to be released through spinal manipulations in order to regulate the flow. The adjustment your body has to this new flow of energy is what ends up causing those cold-like symptoms. However, don’t worry, they won’t last long, and the benefits you will get from the chiropractic treatments may make it worth it.

Car Dealer Vs The Private Sale

What Is Used Car Dealer Insurance?

Used car dealer insurance offers coverage to protect auto dealers from incidents that may result in extreme financial loss.

For example, if some of your vehicles are vandalized, an employee steals expensive equipment, or a customer files a claim against your dealership for damages due to a faulty vehicle, your company may be on the hook for the expenses.

To avoid bearing the brunt of these difficulties, it is important to take out a comprehensive used car dealer insurance policy package that includes important coverage such as workers’ compensation, general liability, product liability, and more, depending on your needs.

What Does Used Car Dealer Insurance Cover?

A typical used car dealership insurance policy will cover:

  • Bodily and personal injury
  • Property damage
  • Loss of income due to robbery, burglary, theft, embezzlement, etc.
  • Stolen business property
  • Vandalism
  • Product liability
  • Medical costs and missed wages for employees injured on the job

Depending on your specific needs and risk factors, your policy may include more or less coverage than described above. Be sure to review your policy closely to fully understand your coverage.

Who needs garage insurance?

If your business performs services, repairs or preventative maintenance on vehicles that are owned by customers whom pay for these services or have their insurance company pay for these services, then your business fits the profile of a business needing Garage Insurance; Garage insurance coverage is similar to medical malpractice insurance, but is specific for automotive businesses.

New and used car dealers have much more to worry about than meeting quarterly sales quotas. Garages and dealers whose operations include the sale and service of automobiles and motorcycles are subject to numerous risks. Auto collisions during test drives, injuries to drivers and physical damage to inventory caused by vandalism, fire, flooding will all contribute togarage insurance coverages.

Insurance Corner offers an array of garage auto services, and dealership insurance solutions.

  • GARAGE KEEPERS LEGAL LIABILITY INSURANCE, Garage Keeper’s Legal Liability policy is intended to coverage damage to an auto held by a garage in their care, custody or control. This is while a vehicle is for sale, service, repair, parking or installing equipment into the vehicle.
  • Garage Keepers Direct Primary responds regardless of fault – if the coverage is not written on a direct primary basis then the at fault party’s insurance responds first at the time of a claim.
  • General Liability or Garage Liability is the coverage that responds to on premise Liability exposure, which would work best for your business operation?

What Other Insurance Policies Should Auto Dealers Consider?

While garage liability and garagekeepers insurance are the key policies for auto dealerships, here are a few other types of policies to consider:

  • Commercial auto: Your dealership likely owns company vehicles, such as courtesy shuttles or other cars used for business purposes. A commercial auto policy generally offers liability coverage, comprehensive coverage, collision, towing and labor costs for disabled vehicles, and loss of use/rental vehicle coverage.
  • Commercial property: This provides coverage for your buildings and other property used as part of your business.
  • Professional liability: This protects your dealership against lawsuits related to claims that work provided by your business was not completed properly or to professional standards.
  • Business interruption: If your dealership or service department suffers damage and must close temporarily, business interruption insurance will cover the loss of income and a temporary space to operate the business in the interim.
  • Workers’ compensation: This coverage, required in most states, pays for medical bills, loss of income, etc., when an employee is hurt on the job.

Buying a Car: How Do You Add Insurance If You Buy Over the Weekend?

Even if you’re sure that you’ve considered everything when you’re buying a car, it’s easy to forget about a few small items. One example is insurance. Sure, you probably know which insurance company you’re going with, but how do you add a car to your policy if you’re buying it over the weekend? Since many dealers don’t let drivers take home a new car without proof of insurance, this minor issue may possibly prevent you from driving home in your brand-new car. Fortunately, we have a few tips to make sure that doesn’t happen. Find a new car for sale near you

Check Your Policy

Before you start thinking about how to add your new car to your insurance policy, we suggest checking the terms of your current policy. For many drivers, a newly purchased vehicle is automatically covered for a certain number of days before you ever add it to your policy, precisely to account for situations like this.

Before you visit a car dealer, we suggest asking your insurance agent if your policy has such a clause. If he or she tells you that it’s OK to buy a new car and add it to the policy later, you may want to get this in writing so you can prove to the dealer that leaving the lot without proof of insurance isn’t a problem. If you choose to go this route, however, we strongly suggest that you call your agent as soon as he or she opens his office on the next business day, since many drivers — and even law enforcement officers — can be unfamiliar with this rule.

It’s also important to note that the dealer may not let you leave with your new car just because your insurance company offers a grace period for adding a new vehicle to your policy. This is especially true if the dealer helped you secure financing, since it’s likely that the dealer or the dealer’s bank will want to verify insurance rather than trust that you’ll add it when your agent’s office opens on Monday.

Add It Before You Buy

Yes, it’s possible to add a new car to your insurance policy before you sign the papers. Here’s how: Call your insurance agent the Friday before you buy the car and provide him or her with all the details. This will include the vehicle identification number (VIN), the purchase price and various other important items, including the policy’s effective date. Be sure to set this for the date you buy the car, and you’ll be ready to go.

Of course, you’ll need to know all these details in order to add the car to your policy, meaning you’ll have to be completely set on the exact car you’re buying before you call your agent. As a result, we don’t recommend using this strategy if you haven’t reached an agreement with the dealership, as you don’t want to be locked into a certain vehicle before completing negotiations.

Call the Hot Line

There’s one last resort for drivers interested in taking home their new car the weekend they buy it. Knowing that many shoppers interested in buying a car do so over the weekend, most insurance companies have hot lines (typically using toll-free phone numbers) that allow you to add a car to your policy over the weekend. The downside: If you call the toll-free number, what do you do about the agent you usually work with?

The good news here is that you can usually call your agent when he or she opens on Monday and explain the situation. Typically, they’ll be able to easily access your files, allowing them to transfer the car to your normal insurance policy.

While buying a car can be a stressful process, insurance doesn’t have to be. Our tips ensure that you’ll always be able to drive home happy — and fully insured — in your new car, even if you buy it on a weekend.

Do It Yourself Pest Control Tips

BIG BENEFITS OF HOME PEST CONTROL

Until you’re faced with dealing with pests where you live, home pest control might not be something you think much about. But there are so many benefits to staying on top of pest control in your home. Not only is dealing with them once they’re in your home is important, but so is taking preventative measures to ensure they don’t get into your home in the first place.

Before we discuss how to keep your home pest-free, let’s talk about the benefits of protecting your home against pests.

Your home will be a more peaceful, comfortable place

You’ll protect/maintain your home’s value

You can avoid embarrassing situations with guests

Keeping your food safe and free of contaminants

ENJOY YOUR HOME

When your home is pest-free, you’ll feel more comfortable, safe, and happy. Knowing there are pests like rats, mice, ants, or bed bugs in and around your home makes it hard to relax. The idea that a pest could be lurking anywhere at any time is enough to make anyone want to move! But with pest control services and techniques, your home can be the enjoyable, pest-free environment it should be.

PROTECT YOUR HOME

When you work with the best pest control company to ensure your home is pest-free, protecting it from structural damage and other property damage is a significant benefit.

Not only are pests unsightly and annoying, but they can also cause permanent and expensive damage to your home and your belongings. Pests like rats, silverfish, and termites are common culprits of costly damage to your home — including structural damage. Once pest damage happens in your home, it can quickly reduce your home’s value. If pests damage pricey items like couches and other furniture, this is an added expense many homeowners don’t want to deal with.

How to do a General Pest Control Treatment

The first thing we need to do with any general pest control treatment is inspect the structure. You’re looking for openings or areas that are damaged or missing, where crawling pests could enter. Missing or torn window screens, large cracks in the foundation, around doors or window frames, loose or broken weather stripping, and door guards. Missing vent covers and broken soffits. All of these things should be fixed or replaced before doing your barrier treatment to keep pests from making your home their own

For the barrier treatment, you will need an insecticide of your choice. One, one gallon hand pump sprayer, water, long sleeves, safety gloves, long pants and closed toe shoes.

To use the one gallon pump sprayer, screw the hose onto the tank adapter. turn the pump handle counter clockwise to remove the pump so that the tank may be filled. Where gloves when mixing and handling pesticide such as nitrile chemical resistant gloves. Fill the tank one third to one half full of water, shake the insecticide well before opening, then add the recommended amount of insecticide per the label to the sprayer tank. Secure the sprayer pump and gently shake to agitate the tank to begin mixing. Remove the sprayer pump and finish filling the sprayer with water to the one gallon mark. Replace the sprayer pump and tighten securely harborage by turning the handle clockwise.

To pressurize the sprayer, turn the handle a quarter turn counter clockwise to release it. Then, pump until you feel resistance. Push the handle down, turn a quarter turn clockwise to lock in place. Now you’re ready to spray. Re-pump the sprayer as needed during application to maintain pressure. Turn the end of the nozzle to adjust the spray pattern from a pin stream to a wide cone spray

Now we’re ready to spray. Here are the areas to apply the insecticide. Three feet up the foundation and structure and three feet out onto the ground in a continual band. Around door frames and window frames. Around areas where cables, pipes, wires enter into the structure. Around vents and soffits. Behind down spouts and shutters and any other entry points into the home

How Easy DIY Pest Control Can Be

Don’t Call the Exterminator!

Nobody likes to have bugs around the house. Ants, spiders and roaches just have a way of making your skin crawl. Some people like taking the natural approach to ridding themselves of pests. That typically means using things like boric acid, vinegar and diatomaceous earth.

Other people like to use over-the-counter products you can buy at your local supermarket. But sometimes, the situation is a bit out of control and a bottle of Raid won’t do! That’s when you’ve got to use the stuff professionals use to remediate the situation.

The Chemicals

Here’s where you don’t want to skimp. But don’t worry — quality pesticide doesn’t have to break the bank! I use Talstar P. It’s a professional-grade chemical that sells for anywhere from $30 to $65 depending on how much of it you buy.

Talstar is safe for pets after it dries and it’s non-irritating to your skin if you get some on you. Just be sure to wash your hands thoroughly after applying. Or, better yet, wear gloves.

Is Pest Control Treatment Safe for Babies?

When scanning the contents of websites dedicated to “wisdom and moms,” you will eventually encounter questions concerning child-safe pest control treatment. Ants, cockroaches, termites and other disruptive and destructive home invaders cannot be tolerated for long. Yet parents get nervous when thinking about possibly toxic pest management anywhere near the babies, with good reason.

Things Parents Need to Know About Pests and Pest Control

Pesticides can be harmful and children are more susceptible than adults. Your baby’s body and immune system are still developing. Even the fact that babies crawl rather than walk increases the likelihood of exposure to pesticides. And don’t forget how often children may taste contaminated objects, including their own hands. But while there are legitimate concerns about the safety of performing pest control around children, pests also cause safety and health concerns for children.

All pests leave behind fecal matter and shed skin—two organic materials that can affect air quality and trigger allergic reactions in allergy sufferers. Cockroaches, rats, and other home invaders produce allergens that can trigger asthma and allergies. Fleas, flies and mosquitoes can carry germs, diseases, and bacteria that can contaminate food and other surfaces. Rodents pose a serious danger to human health and are linked to potentially serious diseases including salmonella, e. coli, and Lyme disease.

What Are Your Pest Control Options as a Parent?

Many parents wrongly consider pest management mixed with child safety a problem with such limited options as these three, which in actuality can make pest problems worse:

Temporarily get out of the house until after the pest problem is brought under control and the home is considered safe for children.

Apply small-scale DIY pest control via ant baits, roach motels, sticky mousetraps or some other what-have-you pest management solution.

Avoid dealing with the pests until the problems erupt into a full-scale pest invasion that MUST be handled

Is Termite Treatment Safe for Babies?

If you plan to use other termite control options, such as sprays or dusts, we recommend that you speak to your pediatrician first. Do-it-yourself pest control, especially the types that involve chemical aerosols, make it more likely that your children will come into contact with harmful chemicals. Sprays and dusts, leave behind a residue that may be unsafe for babies, for example. Discuss your options with an expert before using these methods, taking any recommended precautions to reduce the risk to your family.

Should I Clean My Home after a Pest Control Treatment?

If your home had been infested with pests like rodents or insects, you know how big of a nightmare it can become. Depending on the severity of the infestation your only choice may be to hire an experienced pest removal professionals. Pests like flies, rats, spiders, and cockroaches can be a tremendous nuisance

Pest Control Pros services can help you eliminate termites, bugs, rats and other creepy-crawlies from your home. However, in order to do that, pest control pros use a variety of strong chemicals. Depending on the products they use, they may leave a lot of strong odors and even be harmful to your pets (a professional company will always let you know if that is something you need to be careful about).

Are There Any Side-Effects to Pest Control Treatments

First things first, many people often ask pest control dangerous for pets or humans Contrary to popular belief, the chemicals aren’t dangerous or extremely poisonous to humans. However, all the chemicals are poisonous to a certain degree. In fact, the majority of these products is not lethal to humans, at least not in the quantity used during pest control treatments.

Do Not Come Back Before You are Told

If the pest control company asked you to leave your home and not come back until a specific time, make sure you respect that time. In this case, the company may have used some products that could be harmful to your family or pets.

If you unintentionally left any food outside before the pest control treatment, make sure to throw everything away. These could be snacks you left on the table, fresh fruit in the bowl or the leftover cake from someone